Woven Möbius shawl
by Harma Piening
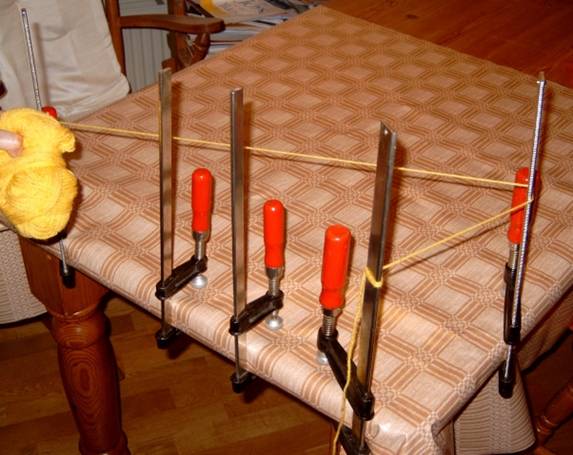
On the internet a lot of information is available on knitting a Möbius shawl based on the technique described by Rita Buchanan in Spin-off. As far as I know nobody has yet described how to weave such a shawl. To weave a Möbius shawl, you need to make a continuous warp with the twist already in it. This can be done by making a warp on five posts, set in a triangular shape. Four posts are placed in a straight line, where the two posts in the middle are used to make the cross. The outer two are corners of the triangle. Post number five makes the third corner of the triangle.
Like knitting a Möbiusshawl, you start in the middle of the warp. This means you need enough space between the posts to take your yarn under the warp (between the posts and the table) so you can make the weaving cross. The space on the diagonal side of the triangle is used to make the twist. You need a triangle because you have to be able to move the yarn around the warp from top to bottom and from bottom to top.
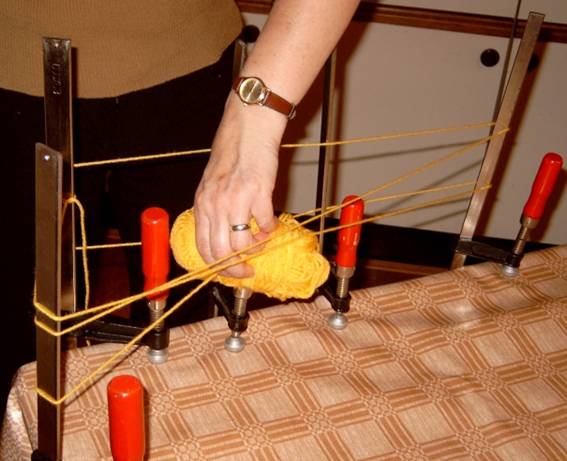
As a start you tie the thread to one of the outer posts in the row of four. Next you make the first loop. Don’t forget to incorporate the weaving cross. For the second loop you choose to go either above or below the previous warp end (in the photo it runs above the first loop). Now the thread has to cross the first one to the other side of the warp. This can be done by either running it along the inside or the outside of the warp. In the example the thread runs on the outside of the first warp thread.
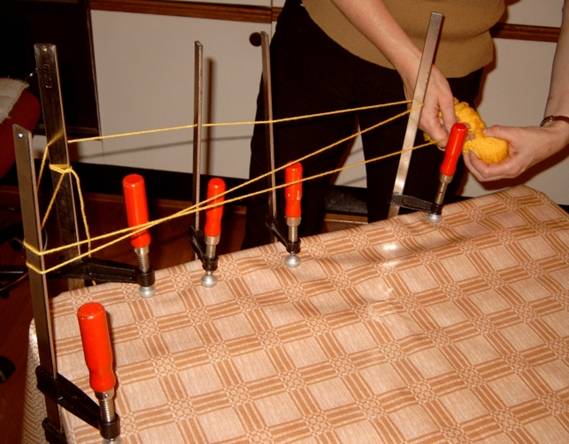
For the third loop the thread runs on the opposite side of the warp (if the second loop runs along the top of the first one, the third loop runs along the bottom). Now you complete the first twist by running the thread along the outside or the inside of the warp (the opposite of the direction you chose for the second loop).
Now repeat the steps from the second and the third loop until you have reached the desired number of warp ends, making sure you always follow the same procedure.

If you want to make stripes in the warp you tie a new colour to the previous one. Do not make all colour changes at the same spot in the warp. Weaving is easier if you have to deal with one knot at a time. Besides, this way it is easier to disguise where you started weaving. Make sure you use knots that can be undone after the weaving, so you can hide these ends by needleweaving them into the warp (in their original direction).

The last warp end is tied to the beginning of the warp, leaving at least 20 centimeters (8”) extra, which is needed when you get at the end of the weaving. You can check for mistakes by running your fingers along one of the threads following the twist. If you can’t follow it from one post to the other you’ve made a mistake somewhere (guess how I discovered this trick).

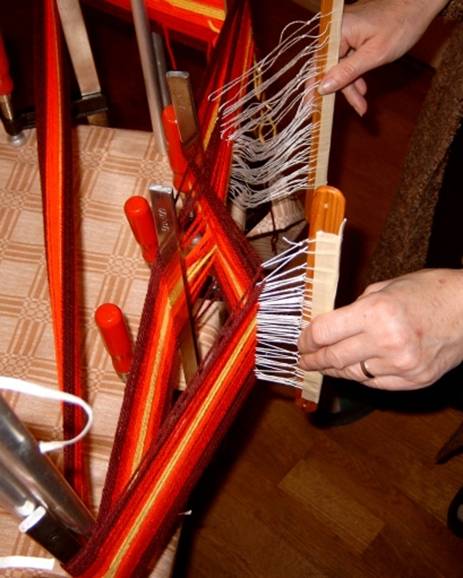
Before removing the warp from the posts the heddles are inserted. Since
with a continuous warp you can’t use a reed, the heddles are taped to the
heddle rod with as much space between them as possible to avoid draw in.
And like always: don’t forget to check and double-check.
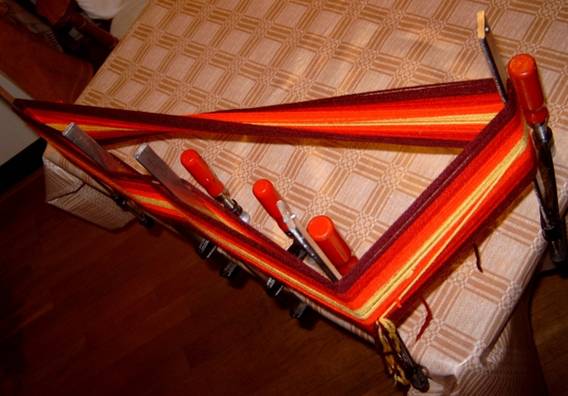
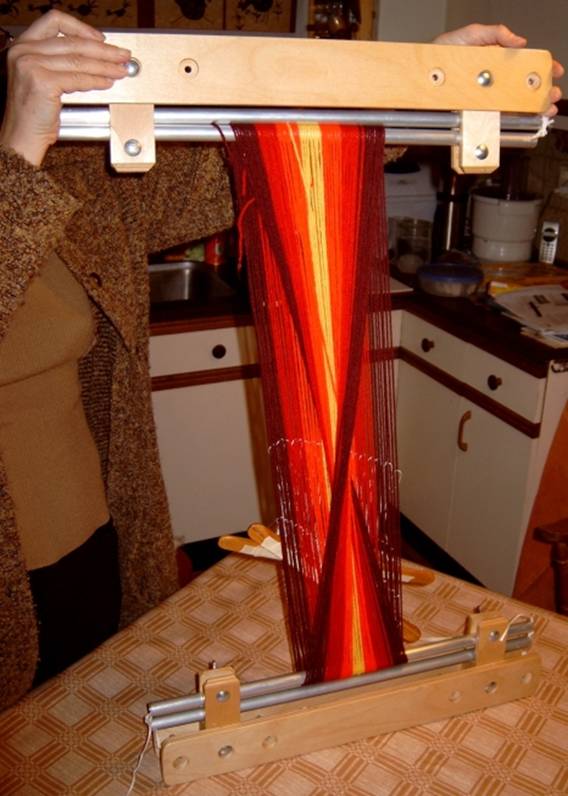
Now the warp must be transferred to some weaving construction like a backstrap loom or it can be tied in a standard loom (between the breast beam and the back beam). Take two rods or sticks and insert these inside the warp loop, close to the position where the ends of the warp are tied together. Prevent the warp from slipping off these rods, so secure them with a piece of string. Repeat this at the other end of the warp. The next photo clearly shows the twist in the warp. While weaving this twist always stays underneath.

As I have some type of backstrap loom, I used this clamped to a piece of board.
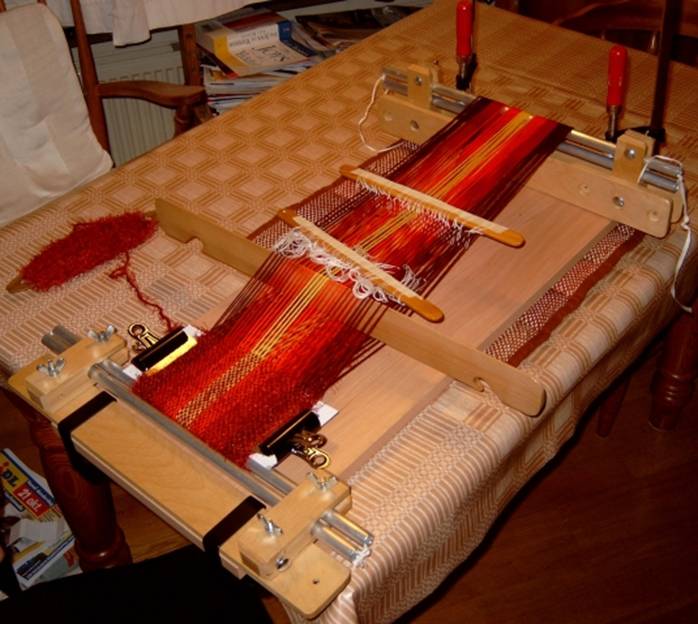
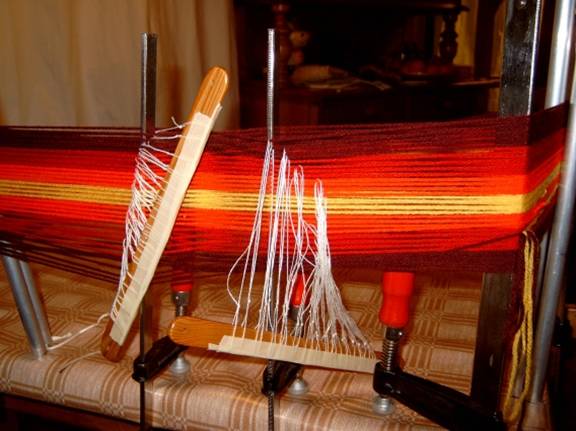
Start weaving close to the knot where the ends of the warp are tied together. To establish the width, weave at first with 4 knitting needles so the threads will easily shift to require their favoured weaving width. After weaving a few inches these needles are removed and a piece of cardboard is inserted between the two warp layers. On this you can outline the width and you can attach clamps to use as a temple.
Use a weaving sword (or a smooth lease stick) to open up the shed and to advance the fell line.
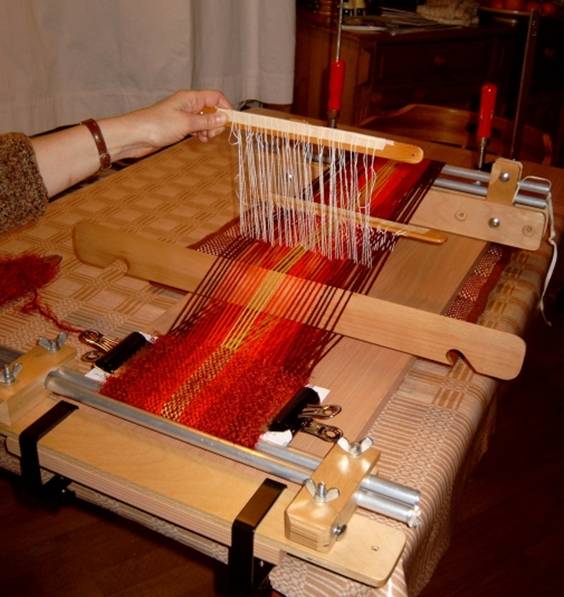
When you approach the end of the weaving the end knot becomes a problem. Undo it and pin both ends to the beginning of the weaving ( this is why the extra length of yarn was necessary). The last bit must be needle woven, but try weaving with one heddle rod as long as possible. The last weft only goes to the middle of the shawl because of the way the warp was made. If the same material is used for warp and weft the middle warp end can be woven to one of the selvedges and the last weft can end on the other selvedge.
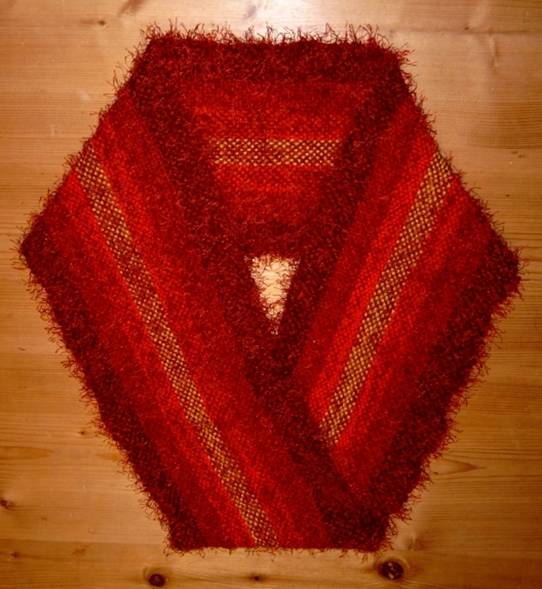
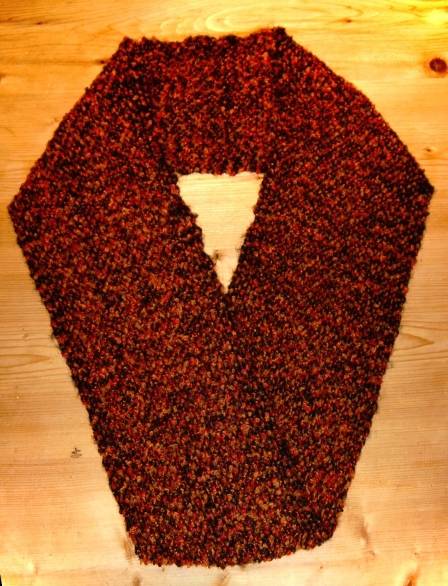
The results